

A smoother photo day starts early June 25, 2026
Preparation protects the photographer’s time for composition
A successful listing shoot starts before the camera comes out. Clearing
surfaces, opening blinds, checking lights, and preparing the exterior help the
photographer concentrate on composition instead of moving household items.
The photo-day preparation guide
Watch the photo-day preparation guide
The walkthrough explains what a photographer can reasonably adjust during an
appointment and what the agent or seller should complete beforehand. It uses
an owner-occupied home to show that strong preparation does not require an
empty or professionally staged property.
Prefer to read? Open the complete lightly edited read-along below the video.
Read along with the video
Lightly edited: Filler words, repeated fragments, and obvious transcription
errors have been removed. The speaker’s wording and meaning are otherwise
preserved.
Hey, everybody. Today we are going to talk about how to prep a home for a shoot. This relates to both you as the agent and your home owners. I’m Jason with Realiant Photography. Let’s get into it.
So previously we talked about what we can and can’t do, whether it’s ethically or just our own limitations on the editing side. This is going to be kind of a part two to that video. So if you haven’t watched it, be sure to go and check it out. And we’re going to focus on what goes on at the shoot and before the shoot in order to set the house up to give you the best images that you can. So let’s start out by asking you a question.
Have you just ever wondered why some listing photos.
and listings just really stand out as just being super clean and sharp and pretty? Well, a lot of the time it’s not actually how they’re shot or what the house actually is and looks like itself. It is how it is staged or if it’s owner occupied, how it is cleaned up and kept to look nice. So let’s get into that so you can get the best photos that you possibly can. So there are things that we can do to help you get the house ready and look nice when we are at the property.
Things that we can do include opening and closing doors is needed, adjusting faucets, opening and closing blinds if we can reach them, not very tall, as well as just really.
simple things like straightening out rugs and mats, turning on and off lights and fans and fires, things like that. Obviously, that’s no problem. That’s included in our service. That is something that we do, but any items of personal nature we really like not to touch anything valuable, anything heavy. We have to show up and shoot the house as is.
We can’t really help you totally reorganize everything for the photos once we’re there because that just kind of wastes everybody’s time. So I want to set you up for success so that when I show up, where we show up, anybody on the team, we can just get right in and get going and take those photos.
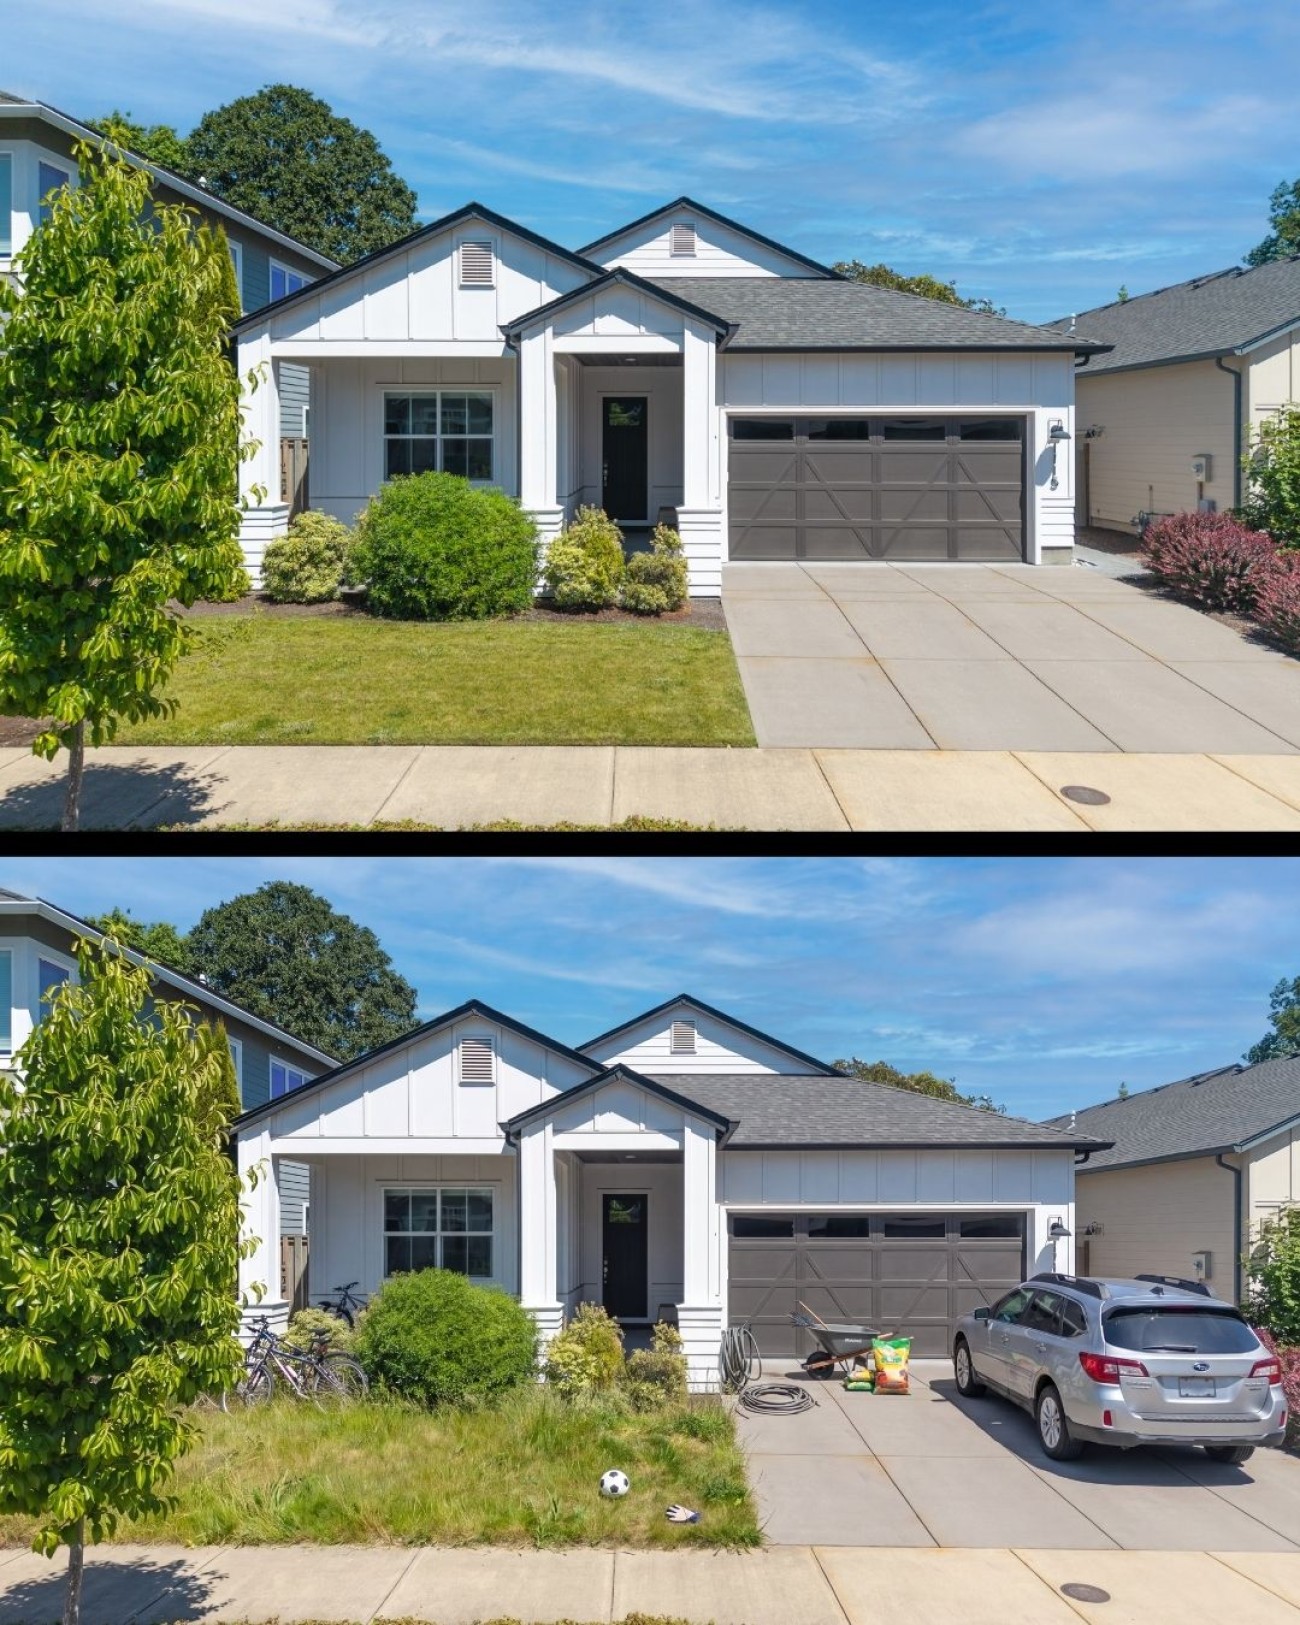
So a few little steps. We’re going to start here looking at a beautiful outside of a house that I recently shot. Such an awesome shoot. It was the perfect example of what an owner occupied home should look like. Keep in mind as we go through these, this is an owner occupied home that is currently being lived in.
This is not professionally staged. Someone’s just living here. This is not a multi-million dollar house either. So if they can do it, and if their agent can do it, everybody can do it, I promise. So just some general things before we get into the actual specifics here.
It’s just good to thoroughly clean the whole property and just do the obvious of make sure everything is nice.
and clean for the outside. Know the lawns, make sure it’s nice and tidy, hire that landscaper to come in, because it’ll pay off. Photos plus really good landscaping, it’s going to sell your house. It just is. So let’s hop right into the actual exterior here and talk about that specifically.
So obviously we want the garage closed. If you want to wash off your patio or your front porch or your driveway, do it with plenty of time so that it can dry. So that any water stains are not on it and it’s nice and dried off. If you have garbage bins, even around the side of the house, sometimes we can see over there. So put it in the garage or way down the street or something, and that’ll just set you up for success. As you can see here, this house looks picture perfect. It was picture perfect. So let’s just take a look at an example of just what a house may look like. Again, this is not trying to shame anybody or to be silly, but just sometimes, I mean, all the time almost, houses are being lived in, right?
So you got a car, you got a few things out. Obviously, you can know to move the car. Everybody knows that. But even like a hose reel and this yard is not too bad, but the difference between this yard and the yard in the previous image.
is huge when it comes to the value of selling the house. And that’s not saying that the house in the second one had a super bad yard. Just a little overgrown. There’s nothing wrong with that, but do your best to get it all nice and cleaned up. My little pro tip here is, if you ordered drone photography—which I think we should really be doing for every listing—be sure to move your cars at least 100 feet away from the house because we like to give nice big overview shots and big neighborhood shots.
So just putting it on the curb by the house is not going to get it done. All right, let’s move on to the inside of the house.
I do really want to reiterate that this is an owner-occupied home. They are
currently living there. I cannot emphasize that point enough. And again, this
is not a super-crazy, high-dollar house. It’s a very nice house.
Don’t get me wrong. But this is not some multimillion dollar mega mansion. All right. So we need every light on in the house that you can get. We are happy to come in and turn them on.
But if you have it ready to go even better, all the blinds open, all the lights on, fans off, fireplaces off. If you have windows with an exceptional view and you want to pop the screen out, that will be a really pro move because.
a screen can interfere with the camera lens. I know it’s a pain. I know
sometimes they get bent, but if you have an amazing view, it really might be
worth it. So we’re going to take a look here. You can see the example that is
quote-unquote messy.
It’s not like it’s bad. This looks like a perfectly normal nice lived in home that I would be happy to take photos of as is. There’s nothing wrong with this. But a couple of personal photos on the wall, a little been just, I don’t know, it’s just not quite as polished as the previous example. And it’s just a really subtle difference.
But I’m sure you can see it as well. I know I’ve been going on about these
first examples.
couple examples here. We’re going to get through the others a little quicker. If you want to find this checklist, we have an agent prep checklist on our website, which we will link for you with all of these steps and everything. So let’s get through some more examples here. So moving on to the next one, we have the kitchen.
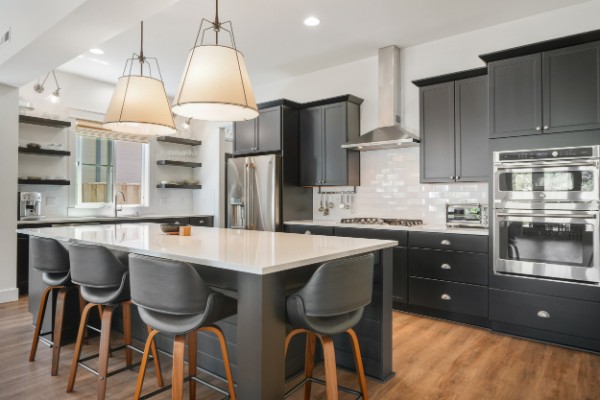
Again, what I like to say here is: clear, clean, and straight. It’s a little
bit of a tongue twister. Clear, clean, and straighten everything. Clear it off.
Remove personal items unless it’s something like a beautiful little
centerpiece.
cherry apple red kitchen aid mixers, that’s gorgeous, leave that obviously because it looks nice, but just clear off wherever you can clear off. Kind of the saying is if you can turn the house upside down and shake it and it falls off, take it off. Again, if it’s something really nice, nice little appliance, a little centerpiece, that’s great, which is kind of my pro tip. If you can put some little fruit basket or something in the middle of the island or the kitchen table, that’s a real good pro tip to go against the rule of clear everything off and make it look really nice. Clean, obviously the cleaner and shinier the surfaces, the nicer and more pro it’s going to look and then straighten.
Things like a rug or a mat anywhere throughout the house—making sure those
lines are nice and straight will make the photos look straight. Even if I take
a straight photo of a room, if it has a slightly crooked rug, the whole photo
is going to look crooked because the room is straight but the rug is not. As
you can see here, there are just a few personal items around and the lights
aren’t all on. For a house like this with a million lights, there are a million
light switches. I can go hunt them all down, but the owner knows where they all
are, so if we can get that all ready to go, that’s great. And like I said:
clean, clean, straighten—just swipe it.
all off, clean it all up, straighten everything out and you’re going to be good to go. When in doubt, just blinds open, lights on, clean up and shove it all into the closets. We don’t take pictures inside closets usually, sometimes we don’t do garages so use those spaces to put all your crap and just get it all out of the way because I promise it’s going to look better. Even if you have stuff around that looks nice, sometimes still just getting rid of it, we’ll just clean it up. So let’s move on here.
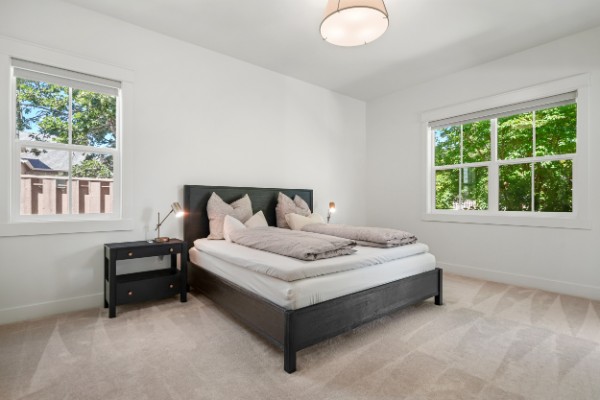
We’re going to go head into the bedroom. Now this bedroom looks fantastic. It is clean, it is clear, it looks like it is just professionally.
done. It’s not, it’s just the owner. They just really knew what they were doing, they worked with their agent. So everybody was in understanding of exactly what to do. And then again, I don’t need to reiterate every single point of time here, we can take a look at our alternate image here.
Again, it’s not bad, but at this point you can see what needs to happen. We’re
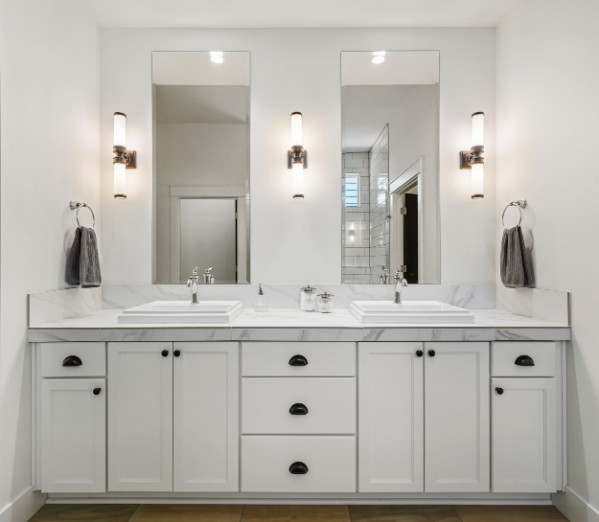
going to move into the bathroom. You can see this amazing shower, and in the
next image there’s just some stuff in it, which is normal for a shower. It
might feel weird to take all your stuff out, but you saw the other image—it
just looks better.
I hope this video helped. The point was to show a normal, nice, lived-in house
that wasn’t destroyed, and to reiterate how going above and beyond to clean it
up can help present your house better. I can see the difference, I’m sure you
can see the difference, your seller can see the difference, and your potential
buyer will see the difference. Until next time, I’m Jason with Realiant
Photography.
Behind the lens
See the idea in the finished media
A prepared kitchen, primary suite, and lived-in home can still feel clear, welcoming, and easy for buyers to understand.
The final five-minute check
A final five-minute check
Walk through the home as if you were seeing it in an online gallery. Look for
cars, bins, cords, personal photographs, pet items, open cabinets, uneven
curtains, burned-out lights, and anything that distracts from the room itself.
Completing those steps before the appointment gives the photographer more time
to create a clear visual record of the property.
Planning your next listing?
Give the photographer a property that is ready to photograph.
Share the address and what makes the property worth seeing. Realiant can help you think through the coverage and media mix before the appointment.
This article reflects Realiant Photography’s June 25, 2026 newsletter. Confirm current services, availability, package details, and timing when booking.
